
Stages of a developing pencil grip
How a child holds a pencil is very important when it comes to letter formation and learning to write, as a functional pencil grip will lead to efficient, pain-free handwriting. The development of a child's pencil grip, however, is a gradual process that will develop as the child grows.
Stages of a pencil grip
There are 6 developmental stages of a maturing pencil grip but it is important to remember that while these stages are 'typical 'every child is different and will develop in their own way and at their own speed.
STAGE 1 - PINCER GRIP
I have included this grip as while it is not a grip normally used to grasp pencils, it is the starting developmental point of picking up small objects with the fingers and will ultimately be used by older children to pick up their writing utensil.
This grip is typically seen from 8-9 months when the child will start to use the pads of their index finger and thumb and later advance into using the tips of these digits (typically between the ages of 10-12 months).
This grip is often seen when children start to pick up food to feed themselves.

STAGE 2 - PALMAR SUPINATE GRIP
Typically seen in ages 12-18 months.
This is basically a whole fist grip and is quite commonly seen in pre-toddlers when they first start experimenting with drawing/painting. The crayon/paintbrush will be held in a closed fist and they will use the whole of their arm to make marks on the surface. During this stage children may prefer to use more vertical surfaces.
Your child will use movement from their shoulder (whole-arm movements)

The hand is in more of a vertical position with all fingers curled around the pencil.
STAGE 3 - DIGITAL PRONATE GRIP
Typically seen in ages 2-3 years.
In this grip, all 4 fingers and the thumb are used to grip the pencil with the palm of the hand facing downwards towards the paper and also the fingers pointing downwards.
The movement comes from the shoulder and elbow and again vertical surfaces may be the prefered choice of creativity.

The pen is help in a vertical position with the fingers pointing downwards towards the paper.
STAGE 4 - QUADTRUPOD GRIP
Typically seen in ages 3-4 years
This grip uses 3 fingers (index, middle and ring fingers) and the thumb and can be either static or dynamic.
A 'static' grip is where the fingers are locked in their position, with the hand muscles doing little work. This pencil movement is, therefore, coming largely from the wrist and above.
A 'dynamic grip' is where the fingers can move the pencil allowing for more precise drawing and writing.

STAGE 5 - STATIC TRIPOD GRIP
Typically seen in ages 3-4 years.
Your child has nearly adopted the most efficient grip. They are using their index and middle finger along with their thumb to grip the pencil however the webspace is much smaller in this stage.
Webspace is the area between your thumb and index finger.

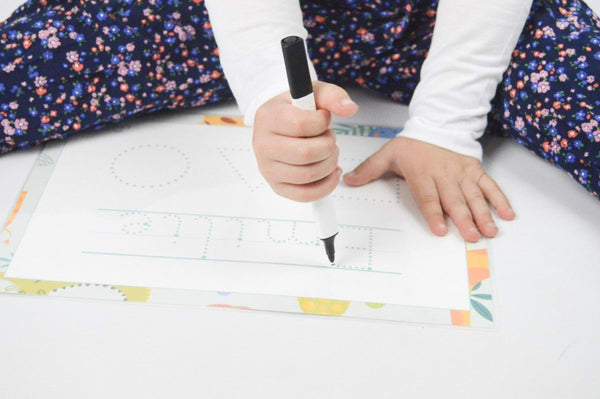
Stage 6 - DYNAMIC TRIPOD GRIP
Typically seen in ages 4-5 years.
The child will start to hold the pencil between the thumb and index finger with the pencil supported on the middle finger. The ring and little fingers are gently curled inwards. This gives an open wide web space which means the movement comes from the fingers.

Is the dynamic tripod grip the correct pencil grip?
Yes and no. While many view the dynamic tripod grip to be the most efficient grip it is not the only functional grip.
I prefer to use the term 'functional grip' rather than 'correct grip' with a functional grip being one which will allow the child to move their fingers independently to form marks enabling neat writing without getting easily tired or suffering discomfort.
All of the following pencils grips are considered 'functional' and are perfectly suitable for producing neat writing.
1. Dynamic tripod grip - as explained above
This provides a good balance of both stability and freedom of movement.
2. Static tripod grip - as explained above
This adds more stability but limits freedom of movement.
3. Quadrupod grip - as explained above
4. Lateral tripod grip - The use of 3 fingers; index, middle and thumb (or 4 for a lateral quadrupod grip) but in this grip the thumb crosses over the shaft of the pencil often resting against the index finger instead of the pencil.
Why do I need to know this?
Information is king as they say and knowing what your child's pencil grip should typically look like for their age will ensure that you are not trying to push your child into adopting a certain style of pencil grip before they are developmentally ready. Pushing little hands before they are developmentally ready can be detrimental. It is very important to develop their gross and fine motor muscles (upper body muscles, shoulder and wrist muscles as well as the small muscles of their fingers). This is best achieved through play with activities such as outdoor play, jumping climbing but also by encouraging drawing, craft activities and threading.
How can I help develop my child's pencil grip?
Separate post coming soon
What if I think there is a problem?
If your child is developmentally ready to be able to adopt a functional/mature pencil grip and is still experiencing discomfort, fatigue and/or untidy handwriting then it would be advisable to see a professional opinion preferably in the form of an occupational therapy assessment.
All images from Growing Hands On Kids